If you’d like to suggest changes, you can open a PR against the repository. You can make your edits either on your computer or within GitHub itself.
Making Edits Inside GitHub
If you are only suggesting small changes, then it can be easier to edit within Github instead of forking the repo and working on your local machine.
To start with this method, navigate to the page you want to make the edits to and choose the pencil icon on the right side. Most pages in this repo have a link at the bottom to take you directly to the .md file in the repository to make this easier.
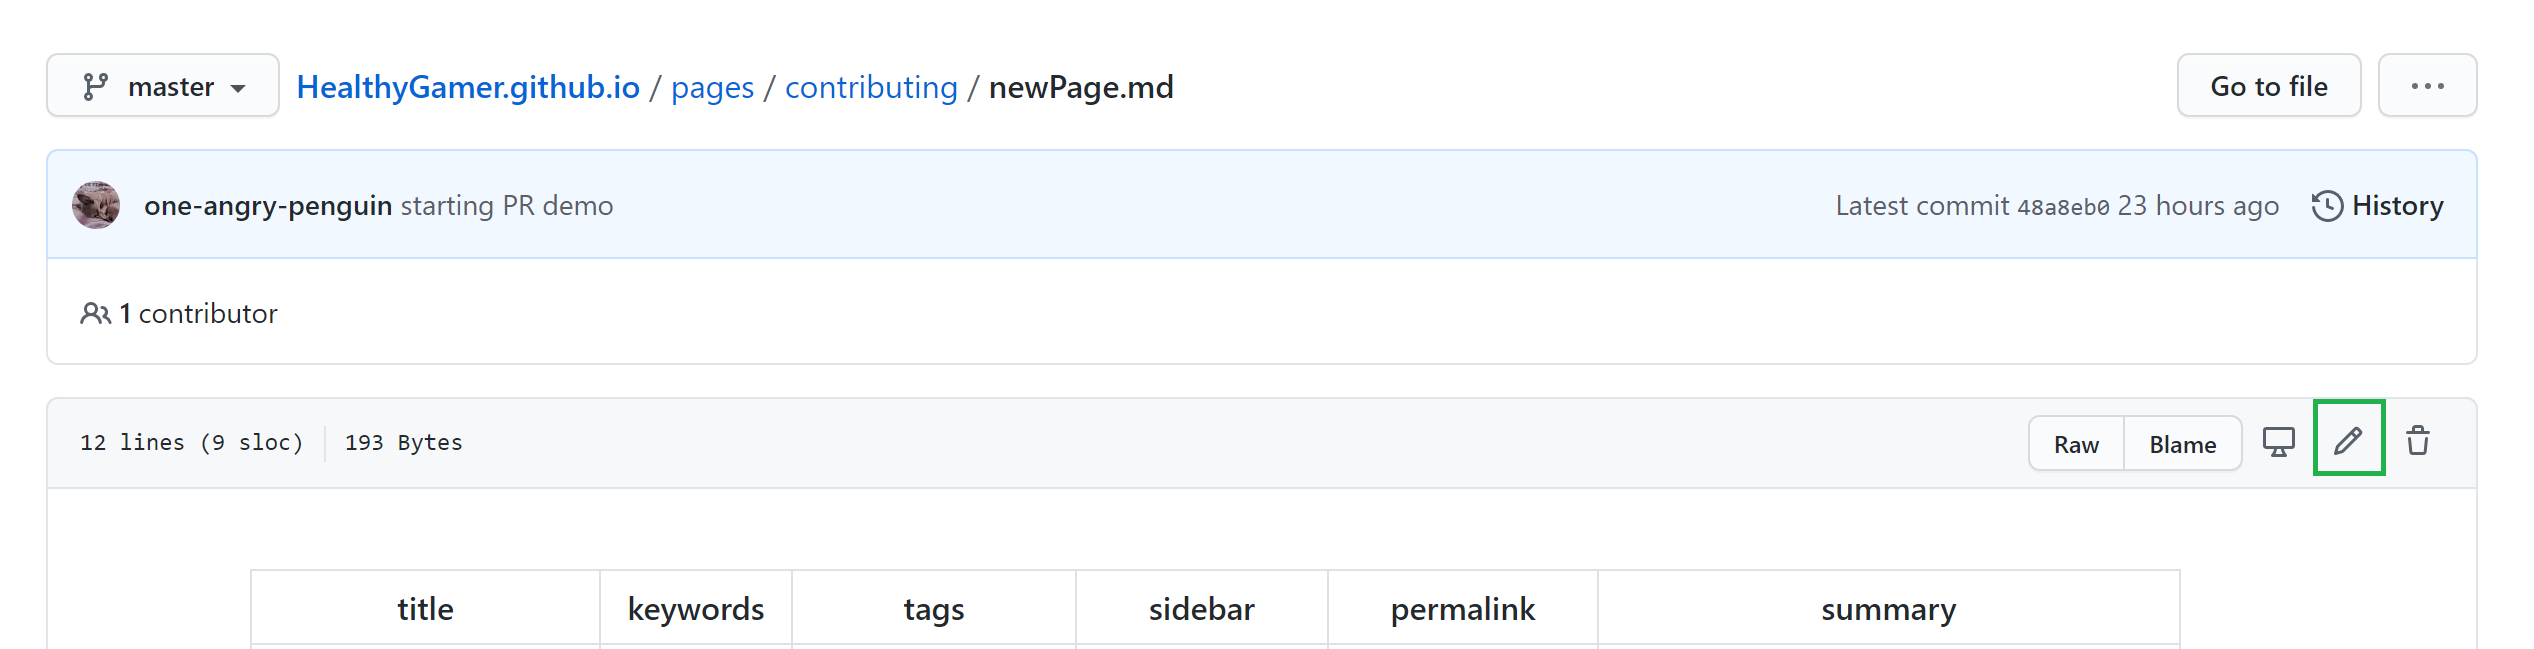
Github will automatically convert your markdown to html when you choose to preview changes, so this is an excellent way to ensure the changes will appear as you intended. Once you are ready, create a commit at the bottom of the page. Ensure that you are creating a new branch or fork even if you have permission to commit directly to the master branch.
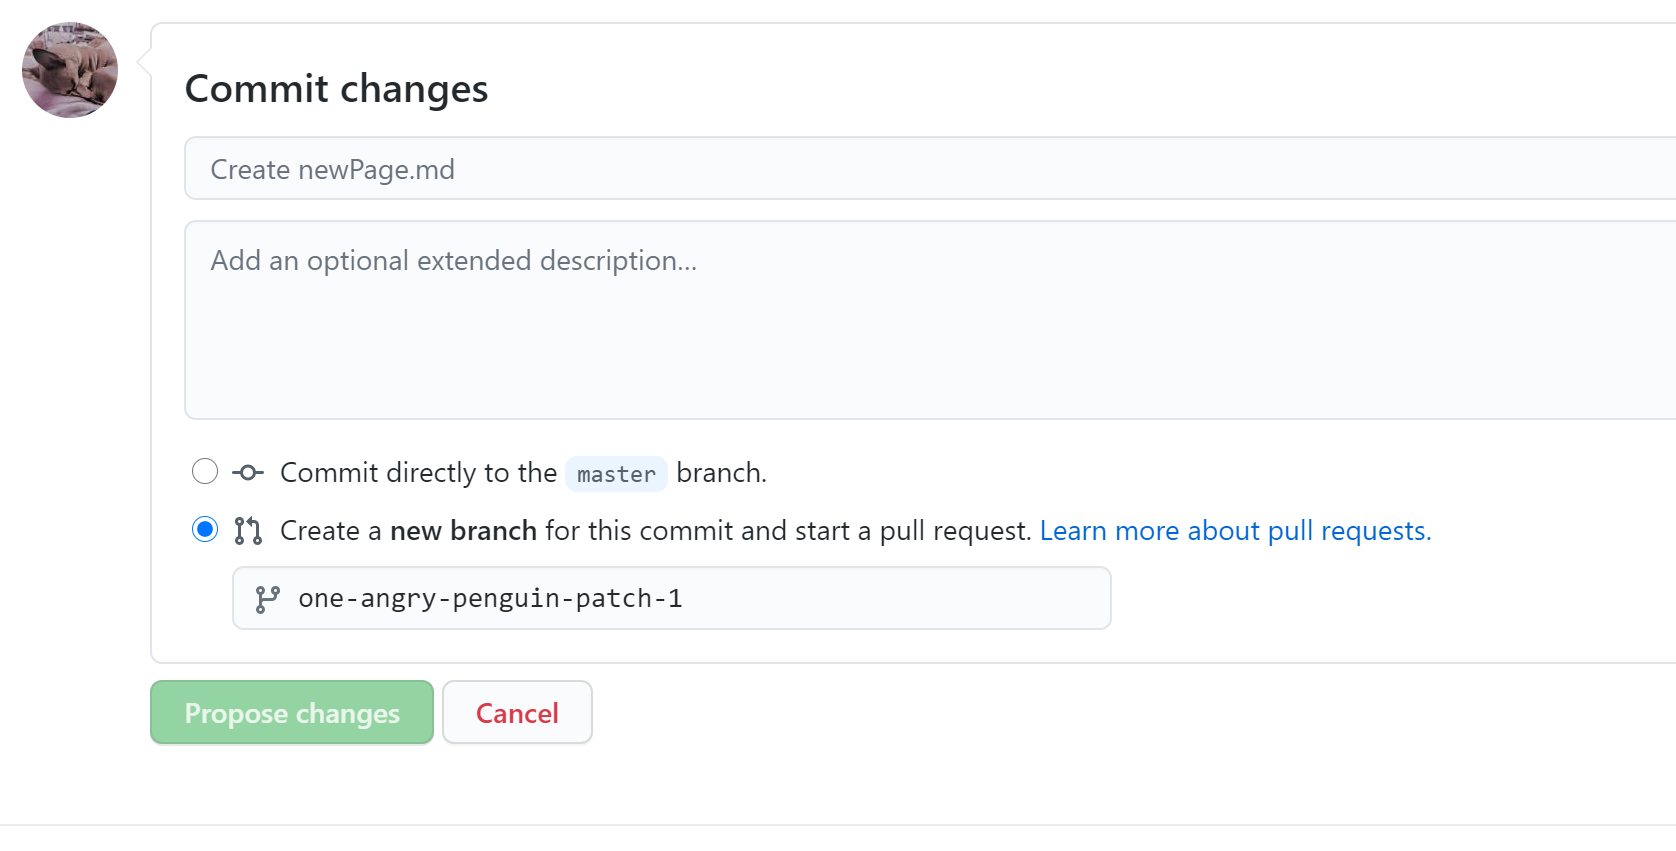
Once you’ve pushed ‘Commit changes’, Github will automatically open up the new pull request screen for you to submit a new PR with those changes.
Setting up the Site for Local Development
VS Code + Windows WSL (Windows Subsystem for Linux)
Setup WSL
The Jekyll engine used to generate the site runs on Ruby. While it is possible to use Ruby with Windows, it isn’t fully supported. Windows Subsystem for Linux sidesteps this by running a full Linux kernal inside a VM inside of Windows. VS Code includes support for doing development against this VM via the ‘Visual Studio Code Remote - WSL’ extension.
The most up to date instructions on setting up WSL is going to be in the Windows docs. The VS Code documentation also has a tutorial for setting up WSL for VS Code development specifically: https://code.visualstudio.com/docs/remote/wsl-tutorial.
Setup Jekyll
Once you have WSL setup you can continue with installing Ruby and Jekyll on your machine. You can open the open your Linux terminal either through VS Code or with type wsl in a cmd window.
Assuming you used Ubuntu as your distro:
- Setup Ruby
sudo apt-get install ruby-full build-essential zlib1g-dev - Create a space to install your Ruby gems outside of root
echo '# Install Ruby Gems to ~/gems' >> ~/.bashrc echo 'export GEM_HOME="$HOME/gems"' >> ~/.bashrc echo 'export PATH="$HOME/gems/bin:$PATH"' >> ~/.bashrc source ~/.bashrc - Install Jekyll & Bundle
gem install jekyll bundler
Clone the repo
- Inside the VS Code terminal type
wslto access the VM - Navigate to the location you would like to store your code. You can either leave it in the VM or on your Windows drive. C: is located within WSL at
/mnt/c - Run
git clone https://github.com/HealthyGamer/HealthyGamer.github.io.gitto pull the repo - If you want to rename the folder you can run
mv HealthyGamer.github.io {new folder name} - cd into your new folder
- Type
code .to open the repo as a project in VS Code. If this is your first time working in the WSL, VS Code may need to do some setup before the code editor comes up. - Run
bundle installto pull gems into your local dev environment - You can setup a launch.json file or run
bundle exec jekyll serve --livereloadin the terminal for local debugging. There are also quite a few markdown preview plugins for VS Code. The downside to the plugin approach is that it will only show the markdown, not the full Jekyll site.
Submitting a Pull Request
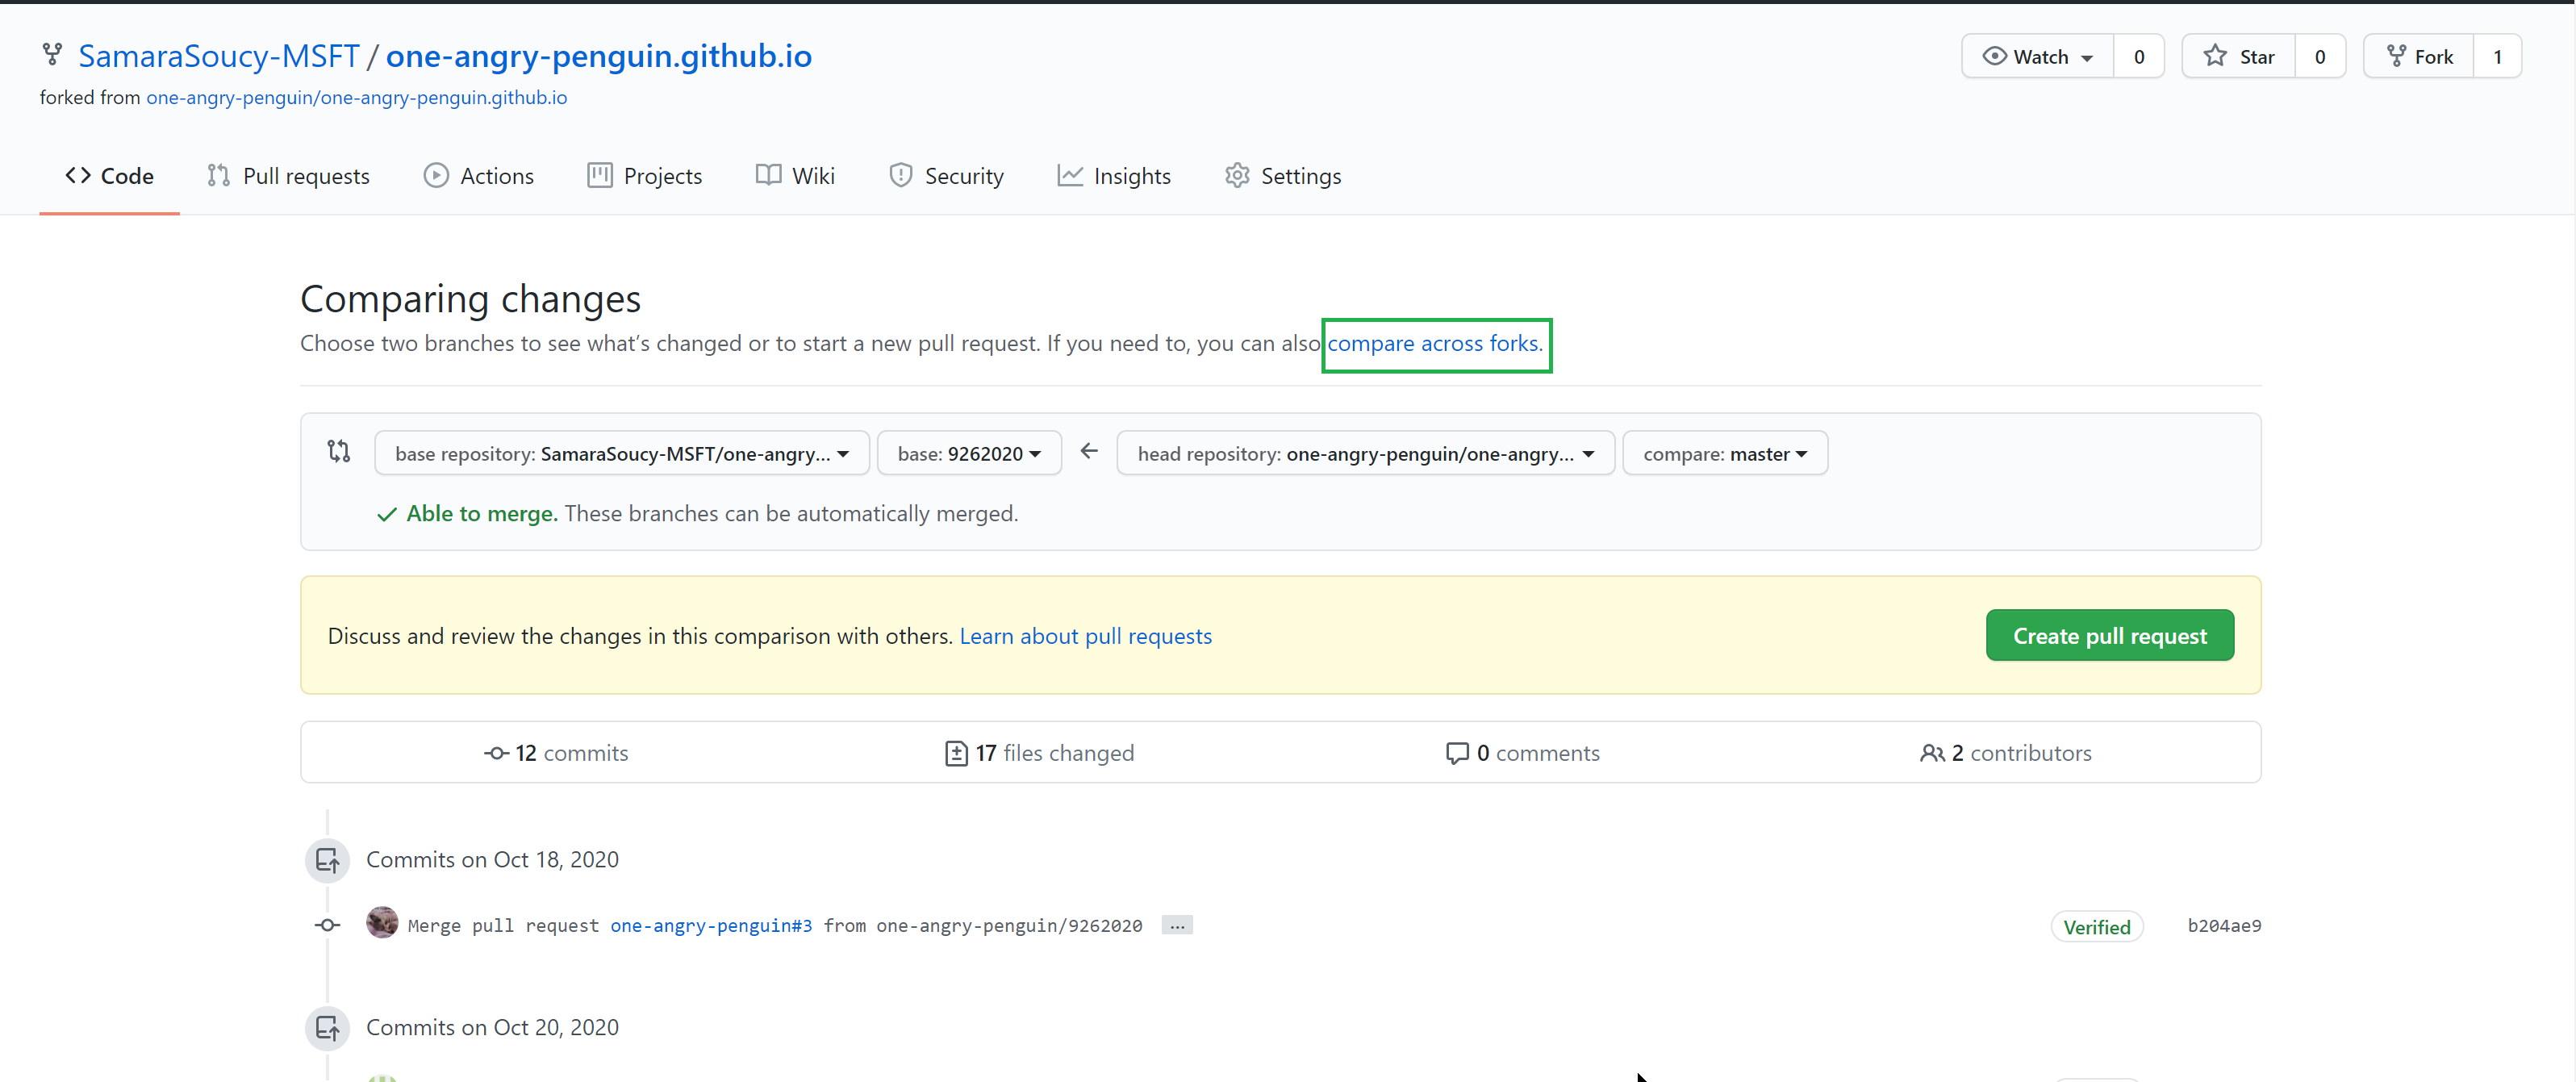
Once you have made your changes, go to the main repository and open a new PR on the Pull Request tab.

The base branch will be the master branch for healthygamer.github.io and the comparison branch will be the branch with your changes. If you don’t see the branch from your fork in the dropdown, you can click ‘compare across forks’ to choose both repo and branch from the dropdowns. If you get a warning about merge conflicts,please resolve those before opening a PR. Take a minute to scroll down and review your changes and then click ‘Create pull request’.
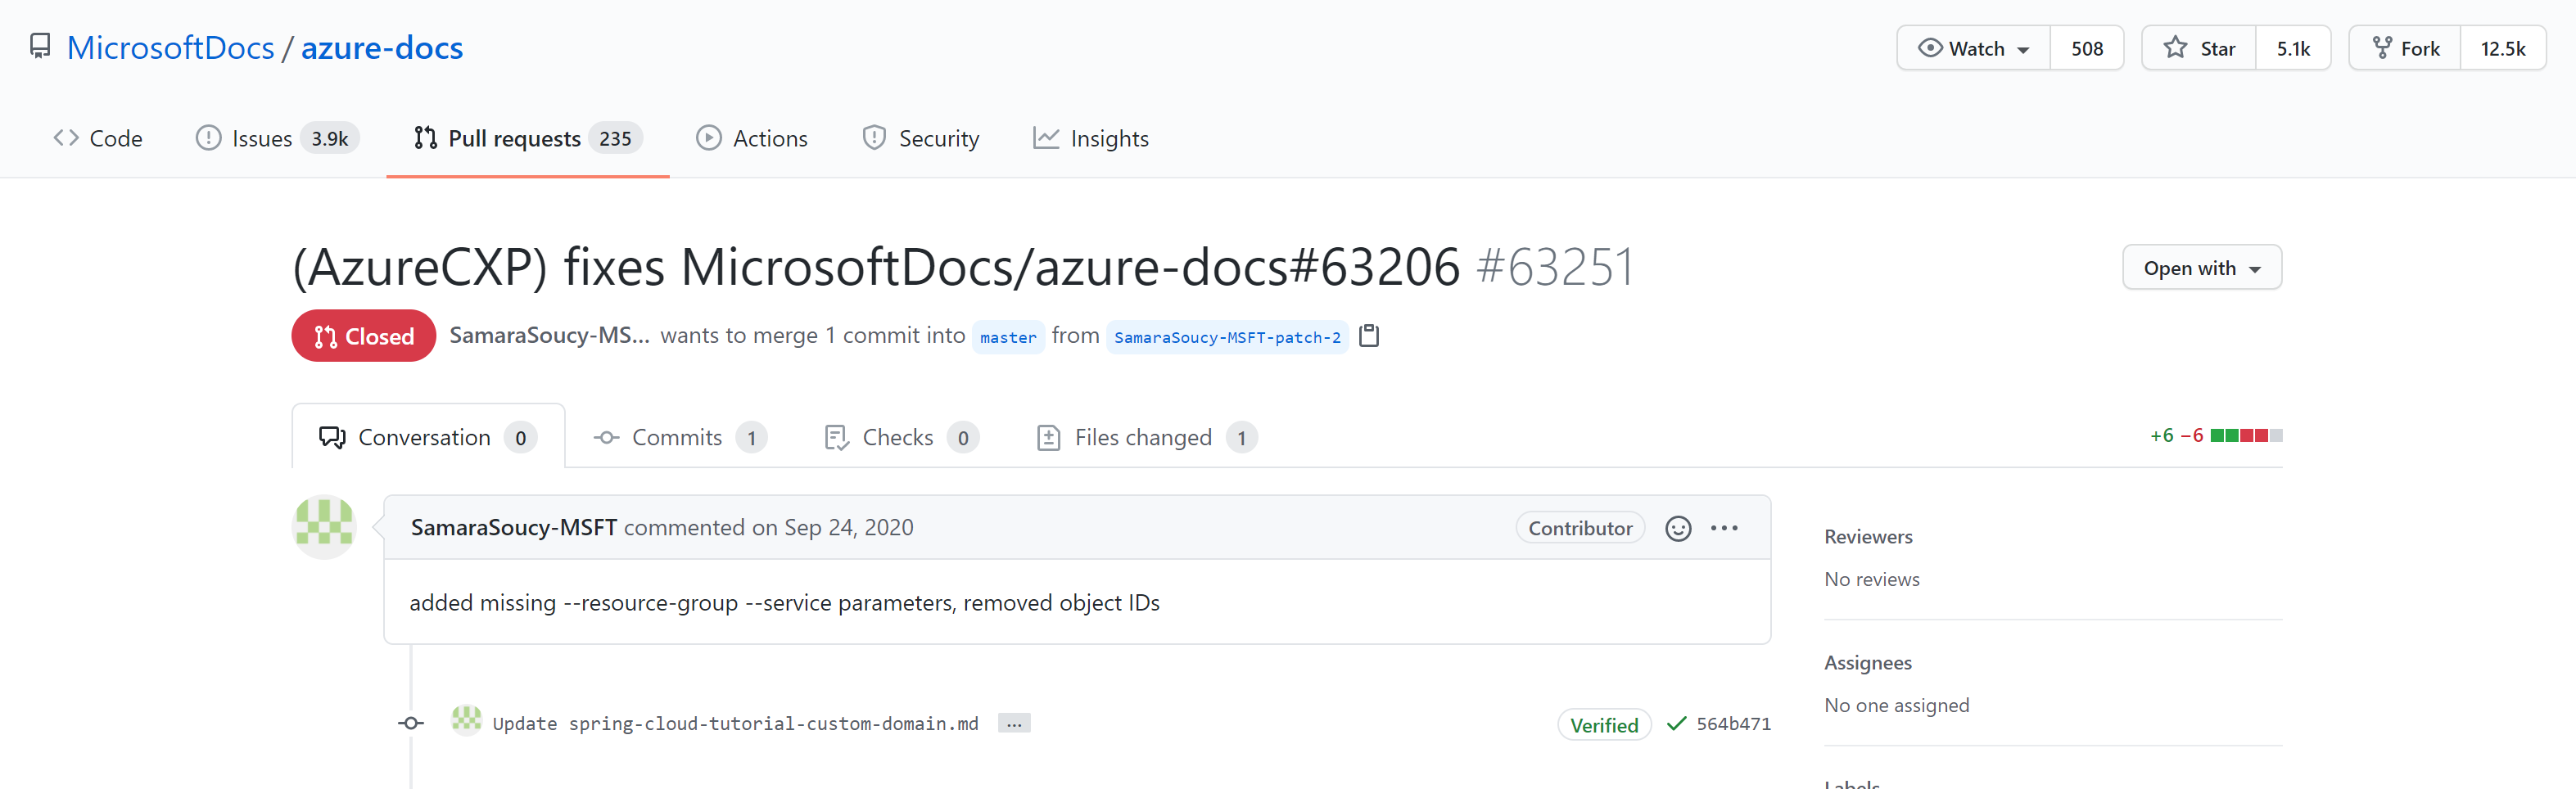
Keep your title short and include a description of your changes in your pull request. You don’t have to link your PR to an issue, but if it relates to an open issue including HealthyGamer/HealthyGamer.github.io#{issue number} in the title or description will automatically link the two together.
Github should send any updates on your PR to your account email. Please keep an eye on that or your Github account in case the maintainer needs you to resolve any issues with your PR before it can be merged.
Useful links: